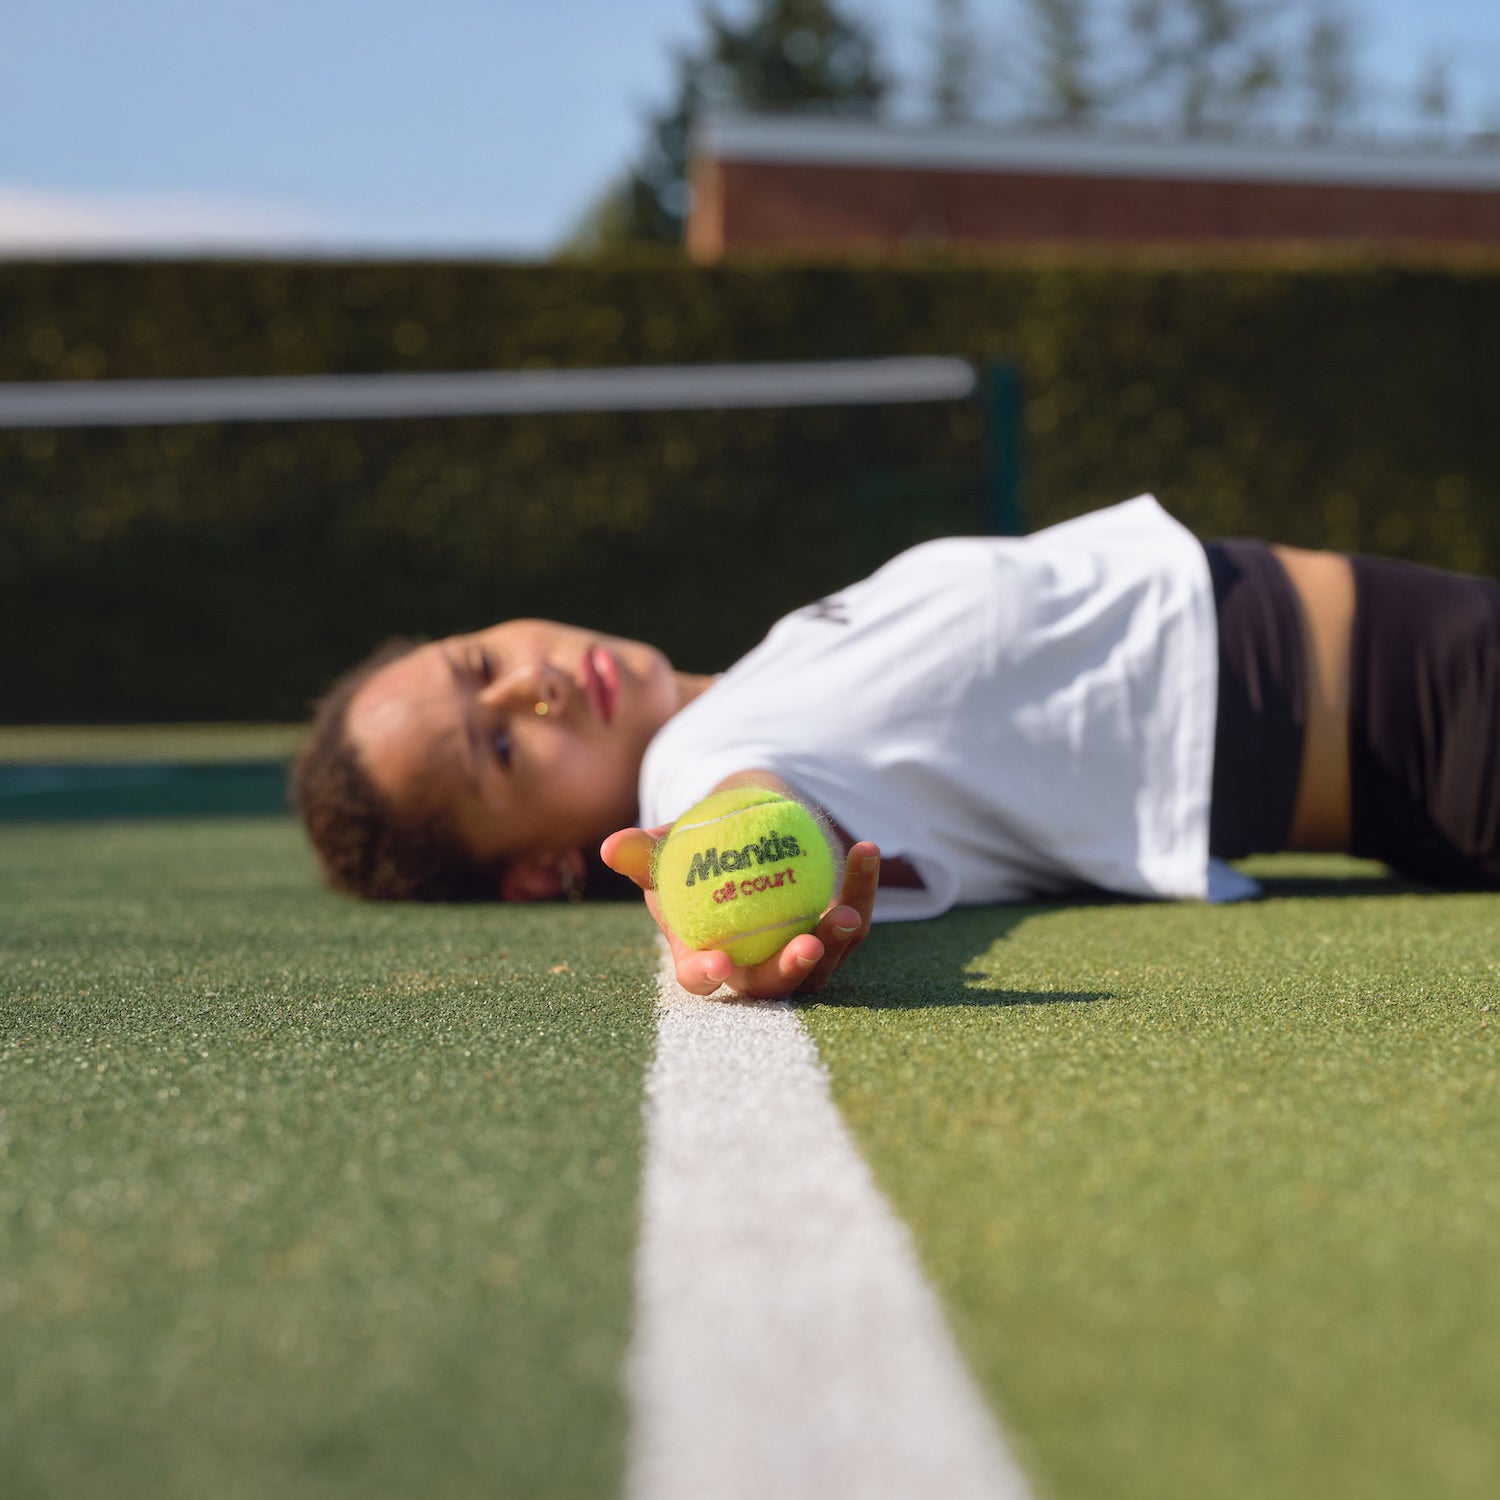


Expert tennis instruction isn't just about hitting balls over a net. It’s about building a solid foundation, understanding the why behind every movement, and piecing it all together with smart strategy and physical conditioning. We've covered some of the basics in our guide on how to choose a tennis racket. At Mantis, we believe the best way to improve is through progressive skill development—mastering one thing before moving to the next.
Building Your Foundation in Tennis
So, you’re ready to get serious about your game. Welcome. This guide is for everyone, whether you’re picking up a racket for the first time or you’re a seasoned club player trying to iron out a few kinks in your technique.
Before you even think about stepping on the court, though, let’s talk about gear. Having the right equipment is non-negotiable. If you're not sure where to start, check out our guide on how to choose a tennis racket. It'll get you pointed in the right direction.
At Mantis, we're convinced that mastering the fundamentals is the only way to unlock your true potential. We'll start with the basics—grip and stance—and build from there, moving through the mechanics of a solid groundstroke, the rhythm of a reliable serve, and the sharp instincts needed for volleys and footwork.
The Growing Popularity of Tennis
There’s never been a better time to get into tennis. The sport is booming across the UK, with a huge surge in people picking up a racket for the first time or returning after a break. This isn't just a small trend; it's a massive movement that’s seeing millions of players hit the courts.
The Lawn Tennis Association’s data backs this up, showing adult participation shot up by 43% to 4.7 million players in 2022. For the first time ever, the number of adults playing monthly topped two million, proving the sport's appeal is stronger than ever.
What This Guide To Expert Tennis Instruction Covers
We’ve structured this guide to give you a clear, step-by-step path to levelling up your game. We break down what can feel like complex movements into simple, repeatable actions designed to build muscle memory and confidence.
Here’s our approach:
- Core Mechanics: We’ll get into the 'why' behind every shot. You'll learn about things like the kinetic chain in your serve and the importance of a proper unit turn on your forehand.
- Progressive Drills: You'll get practical exercises that start simple and gradually increase in difficulty. This ensures you really own each skill before adding the next layer.
- Practical Strategy: It’s not just about how to hit the ball, but where to hit it. We’ll cover court positioning and tactical thinking to make you a smarter player.
At Mantis, our philosophy is simple: consistent, purposeful practice guided by sound technical principles is the fastest way to tangible improvement. This guide embodies that approach.
How to Build a Powerful and Consistent Serve
The serve is the single most important shot in tennis. End of story. It's the one moment in a rally where you have complete control, and turning it into a genuine weapon is an absolute game-changer. But let's be honest, it's also one of the hardest shots to master. The good news? We can break it down into manageable pieces, transforming a complex, clunky motion into something fluid, powerful, and repeatable.
It all starts with the grip. You need to get comfortable with the continental grip, often called the "hammer grip." Every pro uses it for a reason: it allows your wrist to pronate naturally through the ball, which is the secret sauce for generating both serious pace and wicked spin. It will probably feel awkward at first if you're used to a forehand grip, but sticking with it is the first real step toward unlocking a world-class serve.
From there, we build your foundation: the stance. A balanced, comfortable stance is non-negotiable for creating an effective kinetic chain. For a right-hander, this means your front foot should point roughly towards the right net post, with your back foot parallel to the baseline. Your weight should begin slightly on your back foot, ready to explode forwards and upwards into the court.
The Secrets to a Reliable Ball Toss
You can have the motion of a pro, but it means nothing without a consistent ball toss. This one element is responsible for more double faults than anything else. Your goal is simple: create a repeatable toss that puts the ball in the perfect hitting spot every single time, even when the pressure is on.
The trick is to think of your tossing arm as an elevator, not a catapult. It should be a simple, straight lift from your thigh upwards, keeping your shoulder relaxed and using as little wrist as possible. The ball should just gently roll off your fingertips, travelling straight up to its peak.
This is the basic alignment we’re aiming for, from your feet all the way to contact.
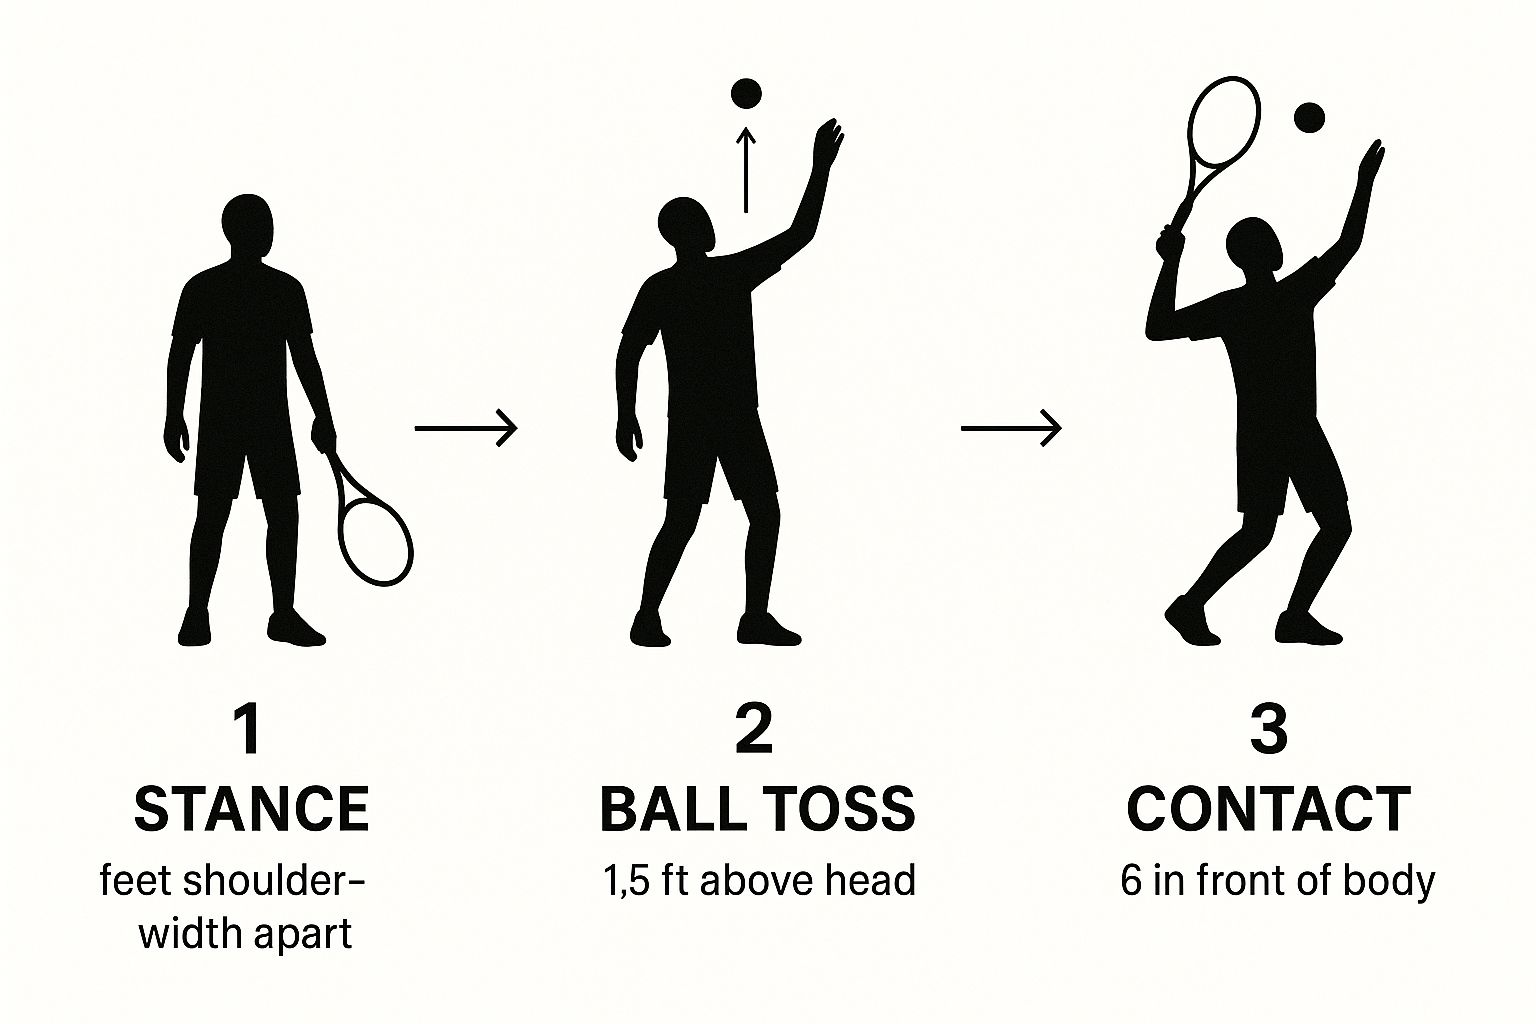
As you can see, a solid stance and a precise toss are what set the stage for an ideal contact point, letting your body generate power the right way.
Unleashing Power with the Kinetic Chain
Effortless power doesn't come from your arm. It comes from the ground up, channelled through the kinetic chain. This is the sequence where energy flows from your legs, through your hips and core, up to your shoulder, and finally whips the racket through the ball.
Picture your body as a coiled spring. As you toss the ball, you bend your knees and rotate your torso away from the net, storing up all that potential energy. The uncoiling is where the magic happens:
- Leg Drive: You kickstart the motion by driving explosively with your legs. This pushes your hips up and forward.
- Torso Rotation: Next, your core and hips rotate powerfully towards the net, which starts pulling your shoulder around.
- Arm and Racket: The arm is the last link in the chain, acting like the tip of a whip. It accelerates rapidly to smash the ball at the very peak of your reach.
A huge mistake players make is trying to muscle the serve with just their arm. Real power feels fluid and rhythmic, not forced. Always remember the sequence: legs, core, then arm.
Progressive Drills for a Better Serve
You won't build a great serve by just mindlessly hitting bucket after bucket of balls. You need structured, targeted practice. We always recommend starting with simple drills and slowly adding more complexity as you get comfortable with each piece of the puzzle.
Here are a few Mantis-approved drills to get you started:
- Toss Consistency Drill: Forget the racket for a minute. Stand on the baseline and just practise your toss, trying to get the ball to land in the same spot just inside the court every time. This isolates the most crucial variable.
- Half-Serves: Move up to the service line with your continental grip. Use a shortened motion, focusing only on the contact point and follow-through. This helps you get a feel for proper pronation and builds confidence.
- Shadow Swings: Go through your full service motion without a ball. This lets you focus entirely on the rhythm and coordination of the kinetic chain without worrying about where the ball goes.
By breaking the serve down and then rebuilding it with these focused drills, you'll develop the right muscle memory. It’s a smarter way to practise that ensures every component is solid before you put it all together.
Introducing Different Serve Types
Once your basic serve is reliable, it's time to add some variety to your arsenal. The three main serves—flat, slice, and kick—all use the same core motion but with small tweaks to the toss and where you hit the ball.
A flat serve is hit directly on the back of the ball for maximum power. A slice serve is brushed on the side, creating sidespin that makes it curve away from your opponent. A kick serve is brushed upwards over the ball, creating heavy topspin that makes it jump high off the court.
Mastering at least two of these serves will make you a far more dangerous and unpredictable player. You’ll be able to exploit your opponent's weaknesses and keep them off-balance from the very first shot of the point.
Developing Your Forehand and Backhand Groundstrokes
If you want a solid tennis game, it all starts with your groundstrokes. Consistent, powerful forehands and backhands are the bedrock of your game—they’re the shots you’ll hit more than any other. Building them up is your ticket to controlling rallies and dictating play.
At Mantis, we focus on building these strokes from the ground up, starting with solid mechanics. It's a crucial area we cover in our guide on tennis lessons for beginners.
And it seems more people than ever are looking to improve. The demand for tennis lessons in the UK has climbed significantly, with search trends showing a 40% increase since 2019. We even saw a massive 140% surge between April 2019 and April 2021. You can find out more about this boom in interest for tennis here
Mastering the Modern Forehand
For most players, the forehand is their biggest weapon. Unlocking its potential comes down to the grip and the swing path. Many modern players have gravitated towards a semi-western grip because it naturally sets up the racket face to brush up the back of the ball, generating heavy topspin.
This grip is the foundation for a fluid, powerful swing built around three key phases:
- The Unit Turn: The second you recognise a forehand is coming, turn your shoulders and hips as one single unit. This coils your body, storing up kinetic energy that you're about to unleash into the ball.
- The Racket Drop: As the ball makes its way to you, let the racket head drop below the level of your hand. This creates that classic loop in your backswing, giving the racket room to build momentum and accelerate upwards into the contact point.
- The "Windshield Wiper" Finish: After you’ve made contact, the racket continues its journey up and forward, finishing across your body, usually over the opposite shoulder. This full follow-through is what ensures you get maximum topspin and control.
A classic mistake is trying to muscle the ball with just your arm. Real forehand power comes from the rotation of your body. Think of your arm as the final link in a chain, not the engine.
Choosing Your Backhand Style
When it comes to the backhand, you’ve got a choice to make: one-handed or two-handed. Each has its own distinct advantages and technical demands. The two-hander is generally easier for beginners to pick up, offering more stability and power. The one-hander, on the other hand, gives you greater reach and fantastic potential for a wicked slice.
At Mantis, we teach both, always focusing on the core mechanics that make each style work.
- The Two-Handed Backhand: This stroke can feel a bit like hitting a forehand with your non-dominant hand. The secret is to let your non-dominant hand drive the racket through the ball while your dominant hand provides the guidance and feel. It all comes together with a solid base and a full shoulder turn.
- The One-Handed Backhand: This is an elegant but demanding shot that requires top-notch timing and strength. Power comes almost entirely from a deep shoulder turn and precise body rotation. You have to prepare early and keep your hitting arm relatively straight through contact to keep it under control.
Progressive Drills to Build Consistency
Getting your groundstrokes to be repeatable and reliable isn’t about just hitting balls for an hour. It takes structured practice. We recommend a progression of drills designed to build feel and control first, then power. The key is to start close to the net and slowly work your way back.
This progression makes sure you nail the fundamentals before adding any complexity.
Building a solid technical foundation with your groundstrokes is about layering skills correctly. The table below outlines a simple plan to take you from basic contact to strategic hitting.
Groundstroke Drill Progression Plan
| Drill Stage | Forehand Focus | Backhand Focus | Objective |
|---|---|---|---|
| Stage 1 Mini-Tennis | Compact swing, focus on control, and feel for the ball. | Maintain balance and use a short backswing from the service line. | Develop hand-eye coordination and consistency. |
| Stage 2 Baseline Rally | Lengthen the swing, incorporating the unit turn and follow-through. | Focus on a full shoulder turn and hitting with depth. | Build rhythm and shot tolerance from the baseline. |
| Stage 3 Target Practice | Aim for specific targets cross-court and down the line. | Practise changing direction of the ball with accuracy. | Improve placement and strategic hitting. |
By starting with control in mini-tennis and then gradually adding power and placement, you’re building strokes that won’t fall apart under the pressure of a real match. Consistency is the name of the game, and these drills are the way to get there.
Mastering Your Volleys and Overheads at the Net
Winning points often means finishing them decisively at the net. This is where you have the best angles to put the ball away, but it demands quick reflexes and sound technique. At Mantis, we teach that net play is less about big swings and more about sharp reactions. Getting comfortable with volleys and overheads is what will turn you from a baseline grinder into an all-court threat.
The foundation for all good net play is the continental grip. This one grip does it all, letting you handle both forehand and backhand volleys without any clumsy mid-rally adjustments. It naturally keeps the racket face slightly open, which is perfect for punching the ball with control and a touch of underspin. Combine that with a stable, athletic base—feet wide, knees bent—and you’re ready for whatever comes your way.
The Art of the Punch Volley
The biggest mistake we see club players make at the net is taking a huge swing. A volley isn't a groundstroke; think of it as a block or a punch. The power comes from your opponent's shot and a short, firm movement from your body. You're essentially catching the ball on your strings and redirecting it into an open space. The motion has to be compact, with almost no backswing.
This principle holds true for both sides:
- Forehand Volley: For a right-hander, step forward with your left foot, meet the ball out in front, and punch through it. Keep your wrist firm and the follow-through short.
- Backhand Volley: Step forward with your right foot. We always recommend keeping your non-dominant hand on the racket throat for stability as you prepare. The hitting arm then moves forward in that same concise, punching motion.
The glue that holds all net play together is the split-step. It’s that small hop you take just as your opponent is about to hit the ball. This little move primes your muscles to explode in any direction—left, right, or even back for a lob.
Handling Different Types of Volleys
Not all volleys are created equal. As you move closer to the net, you’ll face balls at different heights and speeds. The secret is to adjust your body level, not your swing.
For low volleys, you have to get down to the ball. Bend your knees. If you just try to reach with your arm, you'll almost always pop the ball up, giving your opponent an easy sitter. For high volleys, stay tall and punch forward and down into the court, using that height to create an aggressive, unreturnable angle. Then there are drive volleys, which are hit with more pace. These require an even firmer wrist and a more compact block to absorb and redirect the energy.
The goal at the net is simple: take time away from your opponent. A compact, efficient volley sends the ball back quickly, forcing them into a rushed reply and often creating an error.
Putting Away the Overhead Smash
The overhead is your chance to end the point with authority. When your opponent lobs you, the first move is crucial. Turn sideways immediately and move back using crossover steps. Whatever you do, don't backpedal—it's slow and throws you completely off balance. As you move, get your non-hitting arm up to point at the ball. This helps with balance, but it also helps you track the ball's descent.
The smash itself should feel a lot like your serve. Using a continental grip, reach up high to the contact point and pronate your forearm through the ball. The most common mistake is letting the ball drop too low. You want to hit it at the absolute peak of your reach, just like a serve, to get the most power and the best angle down into the court.
Drills to Sharpen Your Net Game
Confidence at the net comes from repetition. You need drills that mimic what actually happens in a match. We recommend adding these to your regular practice sessions.
- Volley-to-Volley: Start close to the net with a partner, hitting controlled volleys back and forth. This drill is fantastic for sharpening your hand-eye coordination and reinforcing that short, compact motion.
- Approach-and-Volley: Get a partner to feed you a short ball. You'll play an approach shot, follow it in, split-step, and then play out the point from the net. This drill simulates one of the most common attacking patterns in tennis.
- Rapid Fire Volleys: Stand at the net while a coach or partner feeds balls quickly to your forehand and backhand. This is all about improving reaction time and forcing you to trust that short, repeatable punch.
Improving Your Footwork and Court Positioning
You can have the most beautiful strokes in the world, but if you can't get to the ball on time, they don't mean much. Great footwork is the invisible engine that drives a successful tennis game. At Mantis, we see it as the single biggest factor separating good players from truly great ones. It dictates not just your ability to hit the ball, but your power to control the rally and put real pressure on your opponent.
The Foundation of Explosive Movement
Everything starts before your opponent even makes contact. The ready position is your launchpad—a wide, athletic stance with your weight balanced on the balls of your feet, knees bent. From here, every single movement should be kicked off by the split-step. This is a small, dynamic hop you make just as your opponent is about to strike the ball.
Think of the split-step as pre-loading your muscles for action. It primes your body to explode in any direction to intercept the shot. Without it, you’re always reacting a fraction of a second too late, constantly forced into defensive slices instead of setting up your own attacks.
Mastering Essential Movement Patterns
Once you land your split-step, you need a toolbox of movements to get you to the ball efficiently. Different situations demand different footwork, and knowing which one to use instinctively is key to conserving energy and maintaining balance through a long point.
Here are the core patterns we drill into our players:
- Side-Shuffling: Your bread and butter for baseline rallies. It lets you move laterally to cover ground while keeping your shoulders facing the net, so you're always balanced and ready to hit.
- Crossover Steps: When you need to cover a lot of court fast—like chasing down a wide forehand—the crossover step is your go-to. You turn your hips and cross one leg over the other to generate real speed.
- Forward and Backward Movement: Attacking a short ball or retreating for a deep one requires quick, small adjustment steps. These are the fine-tuning movements that get your body into the perfect position relative to the ball.
Great footwork does more than just get you to the ball; it visually shrinks the court for your opponent. When you can track down everything, they feel pressured to aim for smaller targets and take bigger risks.
On-Court Drills for Agility and Speed
You can’t improve footwork just by playing more matches; you need targeted, off-ball practice. These drills are designed to build the specific agility, speed, and coordination you need on the court. At Mantis, we build them into every single training session.
Ladder Drills: An agility ladder is a brilliant tool. You can run through dozens of patterns—like the Ickey Shuffle or two-feet-in-each-square—to sharpen your foot speed and coordination. This literally builds the neurological pathways for faster feet.
Cone Drills: Setting up cones in various patterns simulates real match movements. A simple "X" drill, where you sprint forward to a cone, shuffle across, and then backpedal diagonally, is fantastic for practising changing direction under pressure.
These exercises are fundamental to developing the physical attributes for high-level tennis. Nurturing talent from the ground up has a long history in the UK. The Lawn Tennis Association (LTA), founded way back in 1888, has evolved its strategies over the decades to better support grassroots development with programmes aimed at boosting participation and developing junior players.
The Principle of Smart Recovery
Getting to the ball is only half the battle. What you do after you hit the shot is just as important. The principle of recovery is simple: get back to the best possible court position as quickly as you can, ready for the next ball.
For baseline play, this almost always means recovering towards the centre of the court. After being pulled wide for a forehand, for example, you should immediately use crossover steps and shuffles to get back to the middle. This single act cuts down your opponent's angles and stops you from being left scrambling on their next shot.
By anticipating and recovering efficiently, you stay one step ahead, turning defence into offence and taking control of the point.
Common Questions About Tennis Instruction
As you get more serious about tennis, questions inevitably pop up. How often should I get coaching? What should I be working on? How long will this all take? It can feel a bit overwhelming, but at Mantis, we're all about giving you clear, straightforward answers to help you make the right calls for your game.
Let's tackle some of the most frequent queries we hear from players.
And for those just starting out, our more in-depth guide on tennis lessons for beginners is the perfect place to get a feel for what to expect.
How Often Should I Take Tennis Lessons to See Improvement?
Honestly, the ideal frequency comes down to your personal goals, your budget, and how much time you can realistically commit.
For a beginner who’s keen to build a solid foundation, one lesson per week is a fantastic starting point. The trick is to pair that lesson with at least one separate practice session on your own. This gives you a chance to absorb the professional feedback and then actually ingrain those skills without the coach watching.
Intermediate players trying to iron out a specific technical flaw might want more frequent sessions to speed things up. But no matter your level, consistency is king.
We’ve seen it time and time again: regular, focused practice always beats infrequent, marathon sessions. Hitting for thirty minutes twice a week will do far more for your long-term game than a single two-hour slog every other weekend.
What Is the Most Important Shot to Learn First in Tennis?
While the serve is without a doubt the most important shot in a match—it starts every single point, after all—the forehand and backhand groundstrokes are what you should master first.
Why? Because groundstrokes are the foundation of a rally. And rallying is the heart and soul of tennis. It's where the fun is.
When you can consistently hit the ball back and forth, you build confidence and establish a solid technical base. From there, everything else—serves, volleys, overheads—becomes much easier to add on. A good coach will introduce all the strokes early, but they'll always prioritise getting your groundies consistent first.
How Long Does It Take to Become a Good Tennis Player?
"Good" is obviously subjective, but if we're talking about reaching a solid club level where you can rally consistently and hold your own in a match, you're typically looking at one to three years of regular practice and good coaching.
Your progress depends on a few things: your athletic background, the quality of your instruction, and, most importantly, the hours you put in.
It's so important to set realistic, small goals. Instead of just wanting to "get good," focus on one thing at a time. Maybe it's improving your second serve percentage or learning to hit your backhand with more depth. The journey is about enjoying the process of getting better, one small win at a time.
Of course, a common roadblock for committed players is the dreaded tennis elbow. If that happens, knowing about treating tennis elbow effectively can make a huge difference in getting you back on court safely.
Is Group Tennis Instruction as Effective as Private Lessons?
This is a great question, and the answer isn't a simple "yes" or "no." Both private and group lessons offer unique benefits, and frankly, the best approach is often a mix of the two.
- Private Lessons: These are all about you. You get unparalleled, personalised attention. They're perfect for working through a major technical change or getting sharp for a tournament.
- Group Lessons: These are more social, much kinder on the wallet, and brilliant for learning tactics. You get to hit with different people and play drill-based games, which is much closer to a real match than you can get in a one-on-one.
Many players find a hybrid model works best. Use private lessons to drill down on a specific part of your game, then jump into group sessions to test those new skills under the pressure of a live ball.
At Mantis, we believe progress is born from purposeful practice and the right equipment. Our rackets, balls, and gear are crafted for players who are serious about their game and demand performance without the hype. Explore our collection and find the tools to match your ambition at https://mantissport.com.